Palace of Twilight – The Legend of Zelda: Twilight Princess Part 20

Link travels to the Palace of Twilight in pursuit of Zant. Using light-energy from Sol orbs, Link is able to power platforms and cut through spooky Zant Masks and shadow-crystal fog. In the throne room, Zant pulls Link into an increasingly manic battle which takes place inside previous dungeons. The Fused Shadow pieces are returned… [Read More]

City in the Sky – The Legend of Zelda: Twilight Princess Part 19

Link navigates up, over, and around the wind-swept maze of the Oocca city in the Sky. Kargoroks, Aeralfos, Dinolfos, Deku Babas, Helmasaurus, and the formidable Argorok do their best to stop Link’s trek to find the Mirror Shard. But, with an extra Clawshot in-hand and friendly Peahats galore, they are no match for Link.  Sit… [Read More]

Hidden Village – The Legend of Zelda: Twilight Princess Part 18

Link learns that the key to the Sky is connected to Ilia’s lost memories. After tracing Ilia’s path, Link enters the Hidden Village where a lone Sheikah woman named Impaz lives waiting for "the messenger to the Sky". After saving her from a band of Bulblins and showing her the Dominion Rod, she gives Link… [Read More]

Temple of Time – The Legend of Zelda: Twilight Princess Part 17

Link enters a winding stone structure filled with statues, references to the Sages, and all manner of puzzles. Link faces off with the formidable Darknut who guards the dungeon’s treasure - the Dominion Rod. Using this new item, Link unlocks the path to Armogohma and the mirror shard it protects.  Sit down with your hosts,… [Read More]

Sacred Grove Redux – The Legend of Zelda: Twilight Princess Part 16

Link and Midna make their way back to Faron Woods where Rusl tells them an ancient power resides. Goaded through Lost Woods again by Skull Kid’s mean marionnettes, Link returns to the Sacred Grove and uses the Master Sword to unlock a doorway to the distant past and, deep within, the entrance to the Temple… [Read More]

Snowpeak Ruins – The Legend of Zelda: Twilight Princess Part 15

Link navigates the crumbling structure of Snowpeak Ruins with the help of the Ball and Chain, Yeto’s soup, and the well-meaning directions of Yeta. After finding the Mirror Shard, the ailing Yeta peers into it and is transformed into the fearsome Twilit Ice Mass, Blizzeta. Link defeats Blizzeta, returning Yeta to her true form, and… [Read More]

Snowpeak – The Legend of Zelda: Twilight Princess Part 14

In search of a piece of the Mirror of Twilight, Link finds Ashei on Snowpeak mountain, armed with a mystery to solve: a large monster has been spotted grabbing Reekfish from Zora’s Domain and carrying it up the mountain – no one can follow the creature without getting lost in the blizzard. Link catches the… [Read More]

Arbiter’s Grounds – The Legend of Zelda: Twilight Princess Part 13

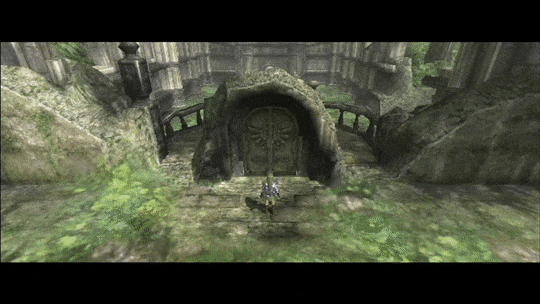
The haunted chambers of the Arbiter's Grounds hint at a darker side to Hyrule's history. Among the decay and otherworldly apparitions, Link contends with Big Poes, wandering hordes of Stalkin, lumbering Gibdo, and the fearsome Death Sword. Obtaining the Spinner, the gargantuan Twilit Fossil, Stallord, is defeated. Link and Midna enter the Mirror Chamber only… [Read More]

Gerudo Desert – The Legend of Zelda: Twilight Princess Part 12

Back at Telma’s Bar in Hyrule Castle Town, Link finds Rusl among the members of a secretive group trying to restore peace to Hyrule. Informed of troubling developments in Gerudo Desert, Link is instructed by another member, Auru, to investigate the condemned prison there. Arriving safely by cannon, Link and Midna find a formidable force… [Read More]

Sacred Grove – The Legend of Zelda: Twilight Princess Part 11

Link races through and underneath Hyrule Castle Town to bring an ailing Midna to Princess Zelda. Reunited, Zelda urges Link to find the Master Sword in the Sacred Grove then heals Midna by passing her life force to her and vanishing in the process. Midna and Link find their way to the Sacred Grove in… [Read More]